![509383c8-8b3f-40e4-a2c1-c7c325b16164-3.webp]](https://myfliip-21229458.hs-sites.com/hs-fs/hubfs/509383c8-8b3f-40e4-a2c1-c7c325b16164-3.webp?height=50&name=509383c8-8b3f-40e4-a2c1-c7c325b16164-3.webp)
Create your Zoom account
Create an account for your center at https://zoom.us and choose your preferred type of package:
Basic: Free
- Does not allow to save lessons
- Maximum 40 minute lessons
Pro: $ 20 / month
- Possibility to automatically save to the cloud
- Maximum 24 hour lessons
- Up to 100 participants per course
More elaborate packages are also available, according to your needs.
Next, schedule all your online courses on your Zoom's schedule in advance. This will give you a unique URL for each of your courses.
Note: that even with the Pro version, you cannot give two lessons simultaneously on the same Zoom account. If you want more than one course at the same time, you have to add additional licenses ($ 20 / month per license).
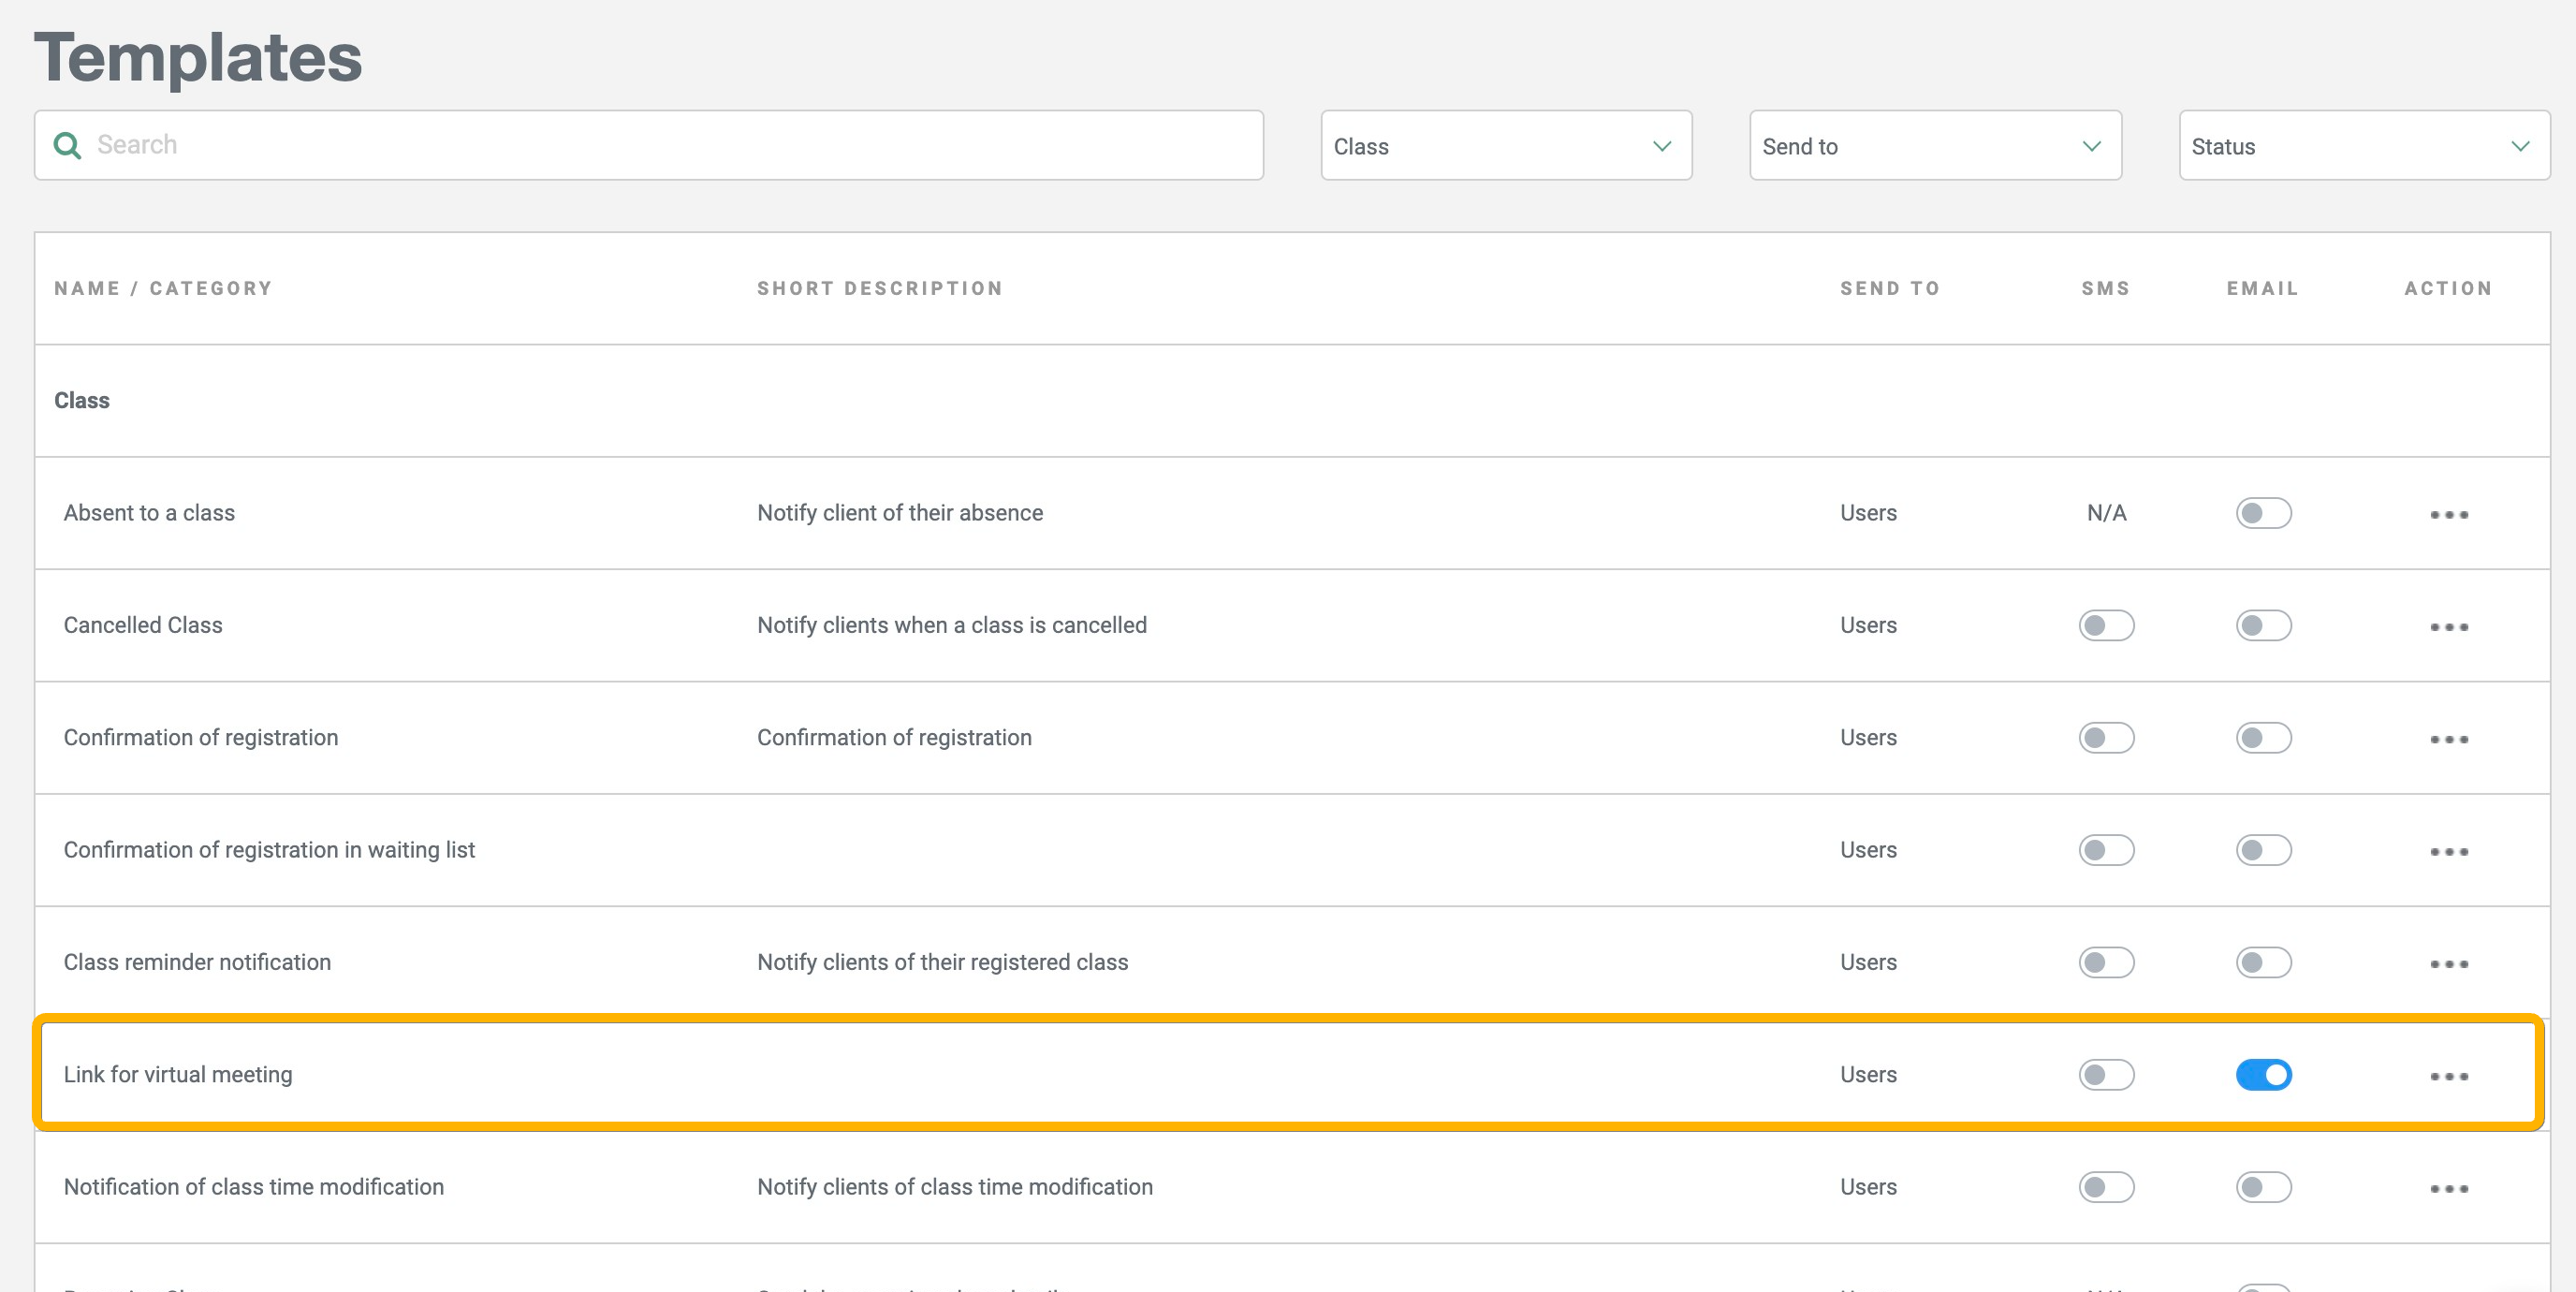
On FLiiP, add your course's Zoom URL directly in your class settings, from the FLiiP calendar by clicking on Edit / Add a class. The URL will be sent as an email to all registered participants 30 minutes before the course start time.
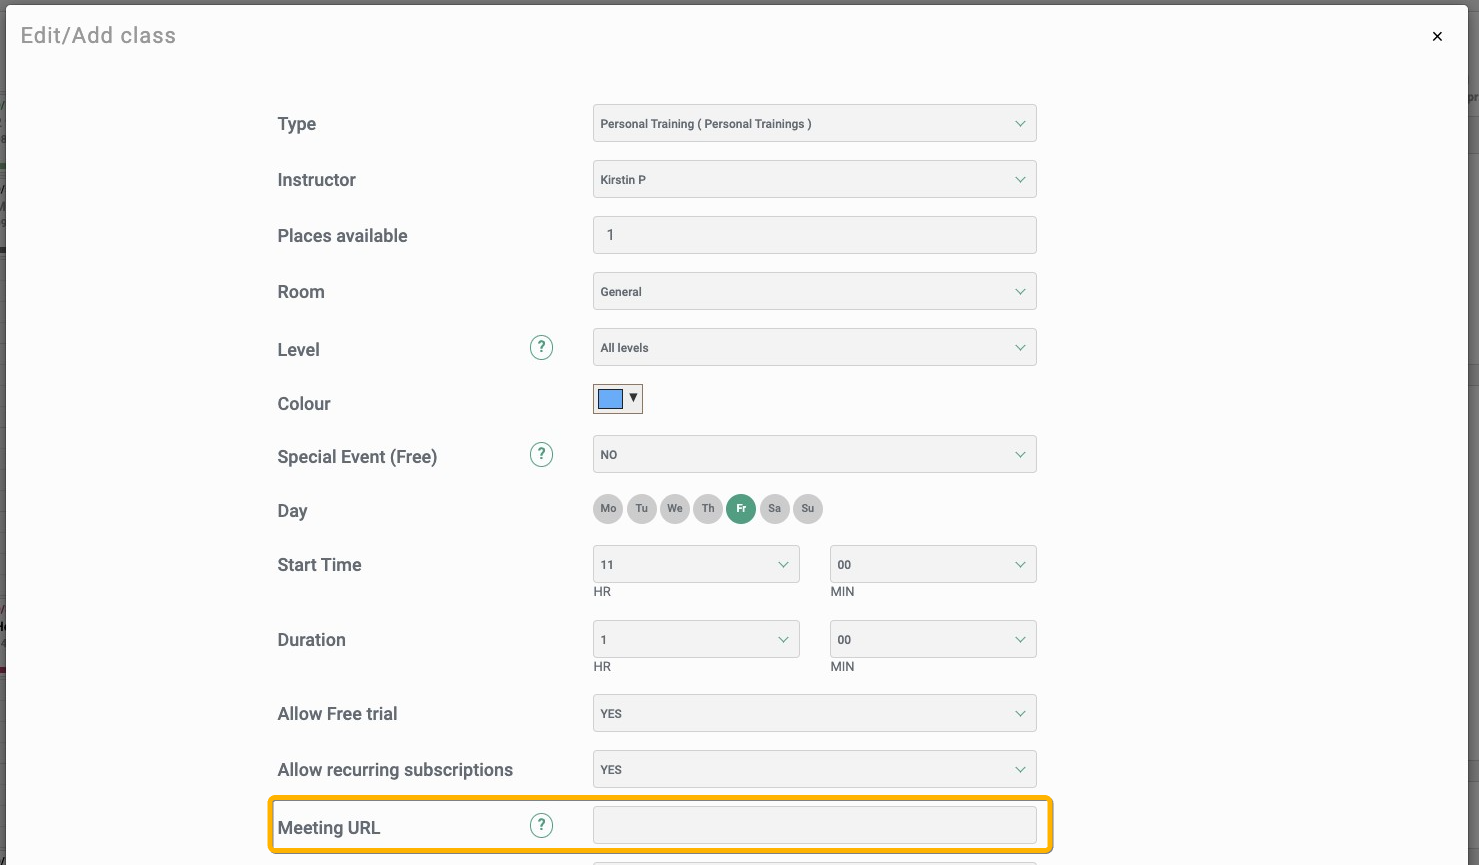
Important: For the link to be sent, make sure the "Link for virtual meeting" email template is enabled in your settings> Templates list!
For your coaches:
Ideally, your coaches should be using the web (computer) version of Zoom in order to have access to all features. They can log in by visiting https://zoom.us, and using your centre's login details.
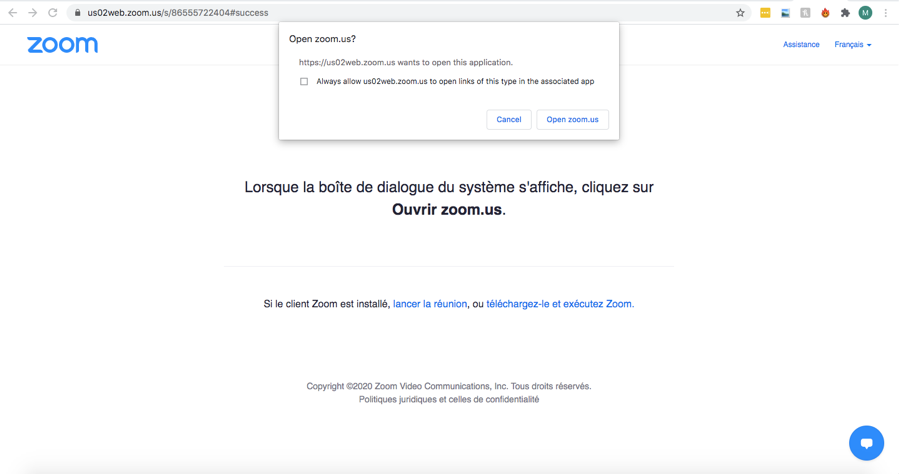
To start the meeting with the participants, click on the course URL. A window will open and then click on Open zoom.us:
Make sure your camera and mic are on. When Zoom is open and you can see the screen, click “Record” at the bottom of the screen to start recording.
Ask participants to turn off their microphones so that they can only hear the coach. You can also ask to turn off their camera, depending on the type of class (yoga, for example).
When the lesson is finished, click on “Stop Recording”. The recording will be sent directly to the email address linked to the account and saved in the cloud linked to the Zoom account.
You can send the recording to your registered members if they were unable to attend the live course. The link to share will be available in your recordings (not the same link as for the live meeting):

It is possible to display a stopwatch or whiteboard from the computer only. Here are the steps to follow:
- Open an internet window and follow the URL https://app.classroomscreen.com/
- By clicking on "Text", you will have a whiteboard
- By clicking on "Timer" or "Stopwatch", you will have a stopwatch. It is possible to have both simultaneously.
- Return to your Zoom window and select "Share Screen" at the bottom of the screen.
- Click on the window corresponding to your Classroom.
To put music (possible if you are on a computer):
- Open an internet window and go to Youtube or any other online music provider.
- Control the music on the webpage alongside your Zoom meeting and people will be able to hear it!
For your clients:
Ask your clients to register for online courses through FLiiP, as usual. They will receive the connection link 30 minutes before the start of the course. By clicking on the link, they will be automatically connected, either through the app or directly on the web.