
This guide outlines the step-by-step process to configure your personalized Branded Mobile App with FLiiP. Follow these instructions to ensure a smooth and successful launch.
The Branded Mobile App is an optional feature. Please contact support or your Customer Success Manager to confirm if additional fees apply.
1. Submit Your Brand Assets
Before we begin building your branded app, please provide the following assets:
Once the assets are ready, please send them by email to mobile.whitelabel@myfliip.com with your CSM in CC.
- Gym Logo
Format: JPG or PNG (with transparent background)
Dimensions: 1536 x 1536 pixels
Ensure the logo background is transparent.
Example:
![]()
- Primary Color
Usage: Used for buttons, navigation bar, and other interface elements
Format: HEX code (e.g., #FFFFFF)
Note: We can use the same color as your FLiiP interface if you prefer. - App Theme (for multi-location apps only)
Choice: Light or dark theme
Applied to all gyms in the group (mobile app only)
Does not affect the web platform appearance - Introduction Slides (Welcome Screens)
Displayed after registration or first login
Format: JPG or PNG
Aspect Ratio: 2:3
You can use our template for inspiration.

- App Icon
Displayed on your members’ mobile devices
Format: JPG or PNG
Dimensions: 1536 x 1536 pixels
Android and iOS require different image sizes; use available online tools to generate the correct sizes (here or here)

- App Store Description
A short description for the App Store and Google Play
Maximum 4000 characters
Please provide in all required languages
Example text:
The [YOUR GYM NAME] app lets you
-
- Book classes
- Rate your experience
- Communicate with the administration
- Manage your memberships and payments
- Quickly access all your locations!
- App Store Screenshots
Images for the App Store and Google Play
Format: JPG or PNG
Dimensions: 1536 x 1536 pixels
Use online tools to adjust image sizes for different devices.

- Privacy policy
Apple & Google are asking for a Privacy policy link hosted on your website.
Format : URL
Example : You can use tools like this one to generate a policy (only an example, you are still responsible of what is written in the policy)
2. Set Up Developer Accounts with Apple & Google
Creating developer accounts is required for app publishing. Please note, these accounts incur costs that are not managed by FLiiP.
Apple Developer Account
- Create an Apple Developer account, with multi-factor authentication (MFA) enabled.
- Register as an organization:
- The account holder must have legal authority to bind your organization (e.g., owner, executive, or senior manager).
- Use your legal entity’s name (not a DBA or branch).
- Obtain a D-U-N-S Number from Dun & Bradstreet.
- Your organization must have a public website with your domain and an active HTTPS certificate (click here to create one)
- Prepare your privacy policy, terms & conditions, and contact form.
- Provide your organization’s phone number and email.
- Pay the annual $99 USD developer fee.
- Once set up, invite “mobile.whitelabel@myfliip.com” to your account with sufficient permissions.
Google Play Developer Account
- Register on the Google Play Console.
- Requirements:
- D-U-N-S Number
- Developer profile contact information
- One-time registration fee: $25 USD
- Once set up, invite “mobile.whitelabel@myfliip.com” to your account with sufficient permissions.
Firebase console account
Create a Firebase Project
🔗 URL: https://console.firebase.google.com/
Steps:
If prompted, sign in using the Google Developer account created previously for your organization.
-
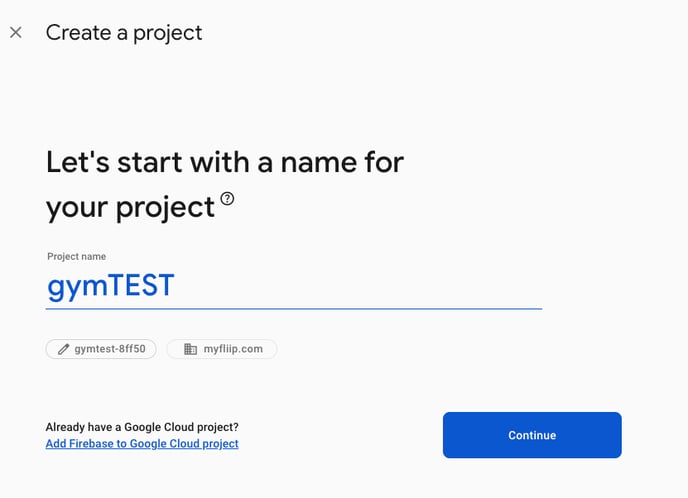
Click “Add project”
-
Name your project (e.g. GYM-NAME) and click on continue
-
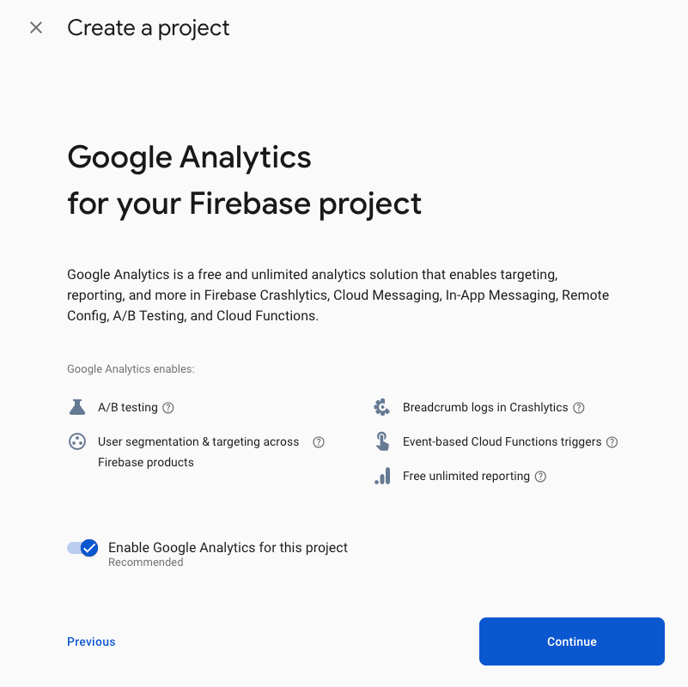
Check “Enable Google Analytics for this project”
-
Choose “Default Account for Firebase”

-
Click Create Project
Invite FLiiP to Google Cloud Console & Firebase
Google Cloud Console
🔗 URL: https://console.cloud.google.com/iam-admin/iam
If prompted, sign in using the Google Developer account created previously for your organization.
Update user permissions
Make sure you have the Organization Policy Administrator (Administrateur de règle d'administration) role assigned at the organization level. If you don’t, please ask your organization administrator to assign it to you.
If you are the organization administrator, here is how to assign the role, either to someone else or to yourself.
Verify that you are in your organization instead of project by clicking on the top-left corner 
Make sure to select the one with the “Organization” type 
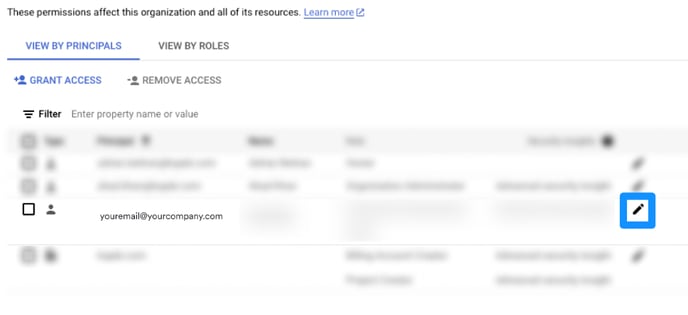
Then click on “IAM” on the left side menu 
Click on the pencil icon next to the user you want to assign that role to
Click on “Add Another Rule”
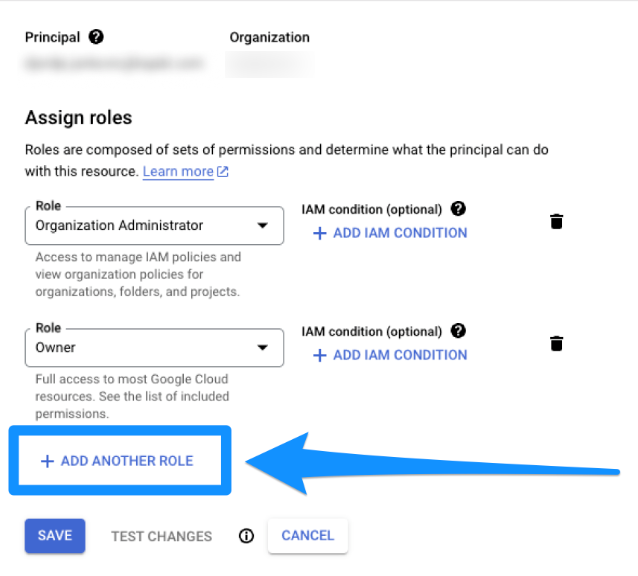
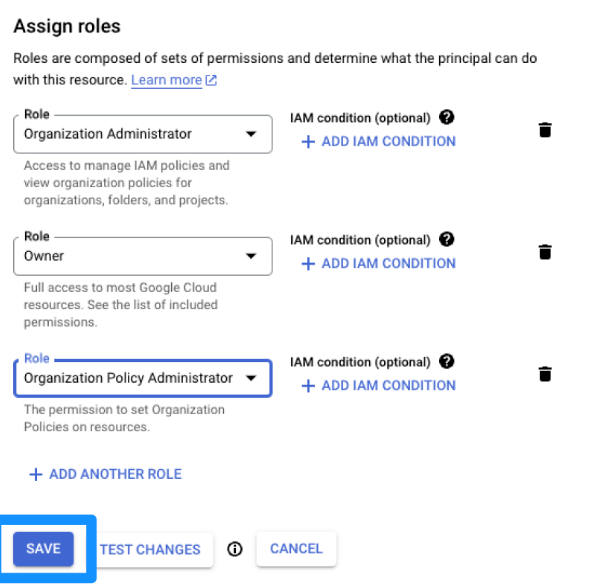
Search for the “Organization Policy Administrator” or “Administrateur de règle d'administration”
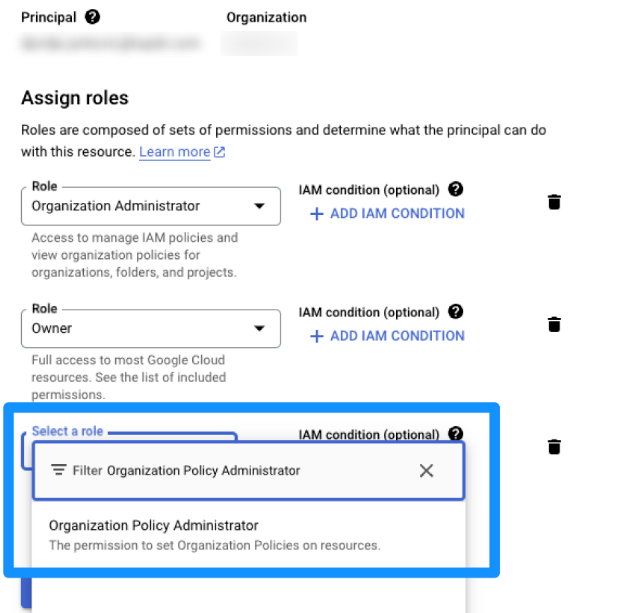
Select it and click “Save” to apply the changes
Update organization policies
Watch the video for a clearer, step-by-step visual guide to the following steps.
Make sure you are still in your organization (top-left corner), not project
Click on “Organization Policies” on the left side menu 
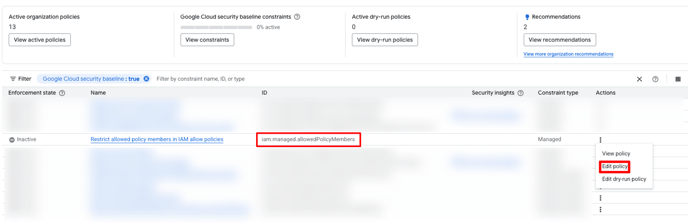
Click on “View constraints” and find iam.managed.allowedPolicyMembers 
Click on “Edit Policy”
Click on “Override parent’s policy”
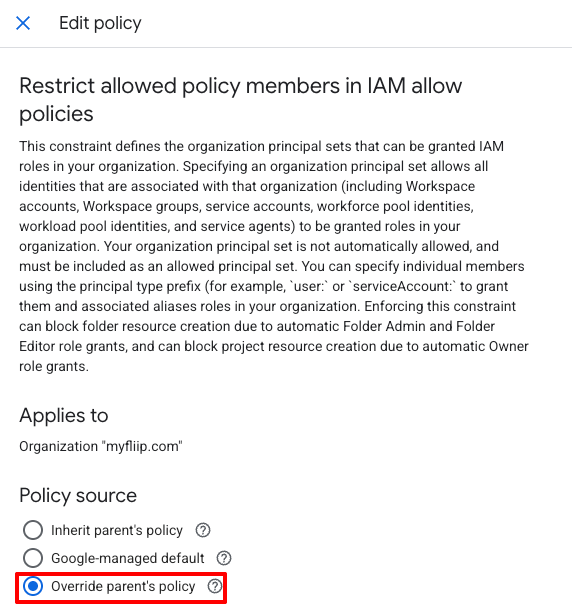
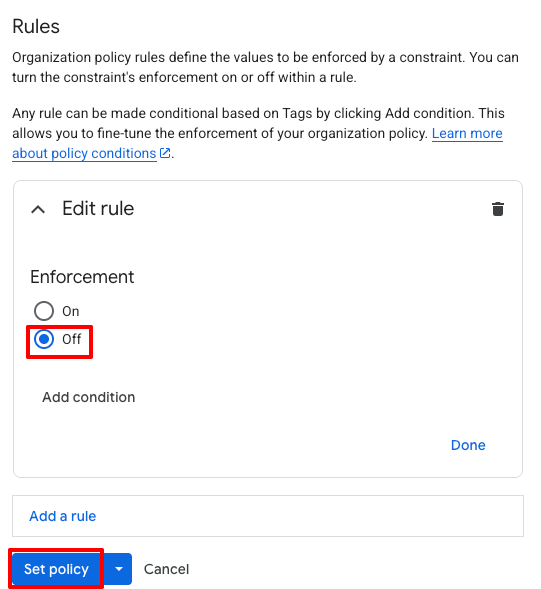
Click on “Add a rule”
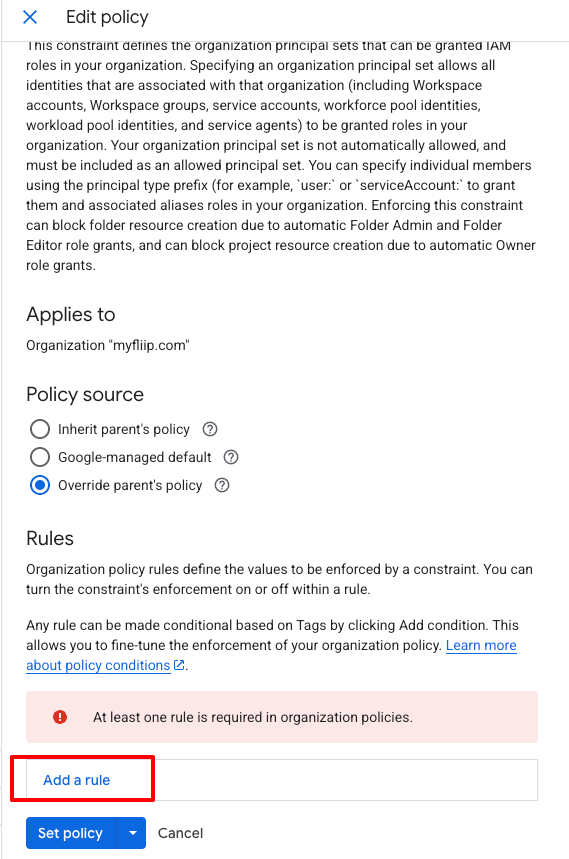
In “Enforcement”, select “Off”, then click “Set policy”
Now go back to the “Organization policies” page and search for iam.managed.disableServiceAccountKeyCreation
You’ll see two entries for it. Please repeat steps 3–6 for both. 
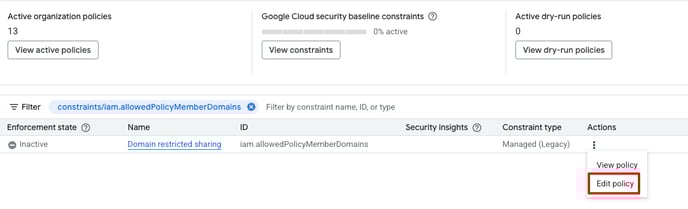
Then on the “Organization policies” page, search for iam.allowedPolicyMemberDomains
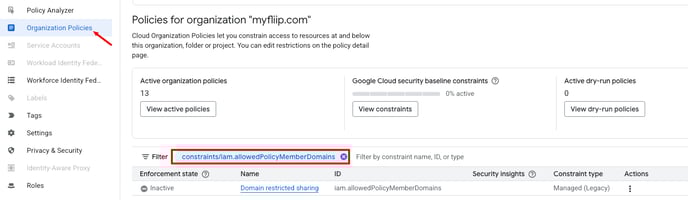
Click on “Edit policy”
Select “Override parent's policy” and “Replace”
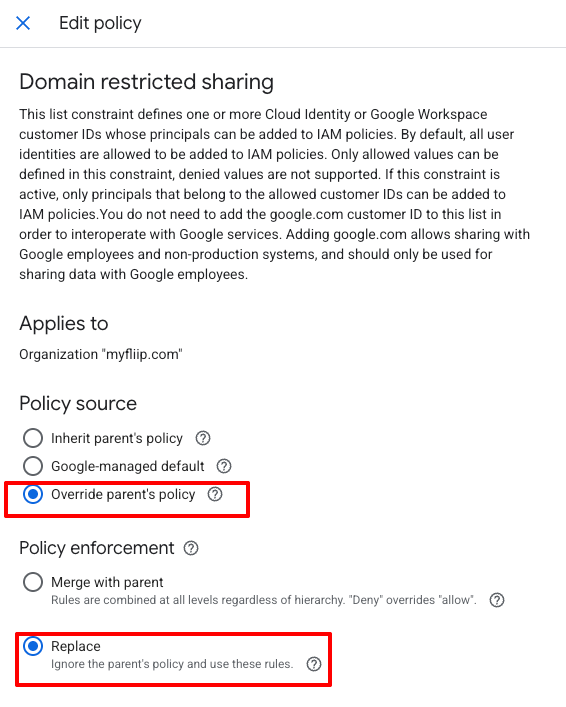
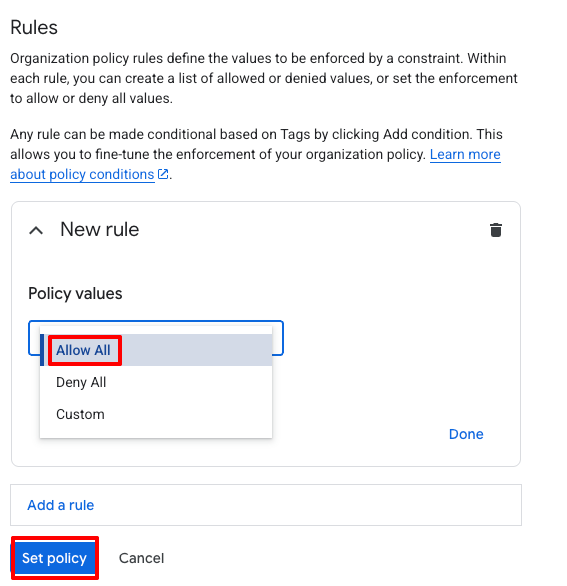
Click on “Add a rule”
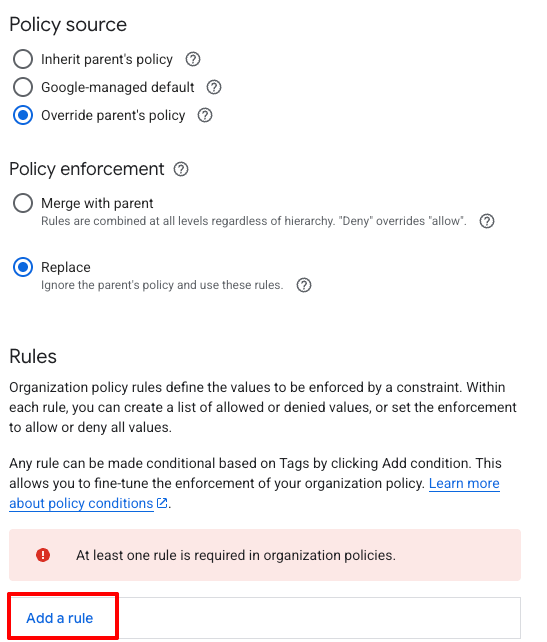
Select “Allow All” and Click on “Set policy”
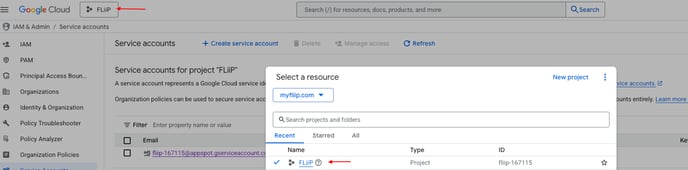
Add FLiiP to your project
Make sure you're in the project you created earlier in Firebase.
-
To switch, click on top left rectangle, ex. FLiiP.
-
In the “Select a resource” panel, choose the correct project.
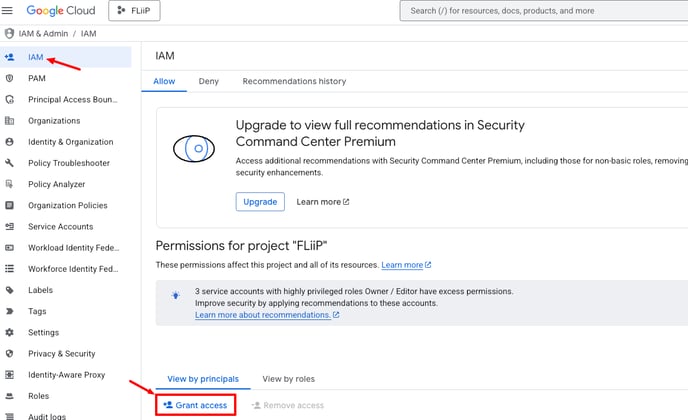
Go to “IAM”, Click on "Grant Access"
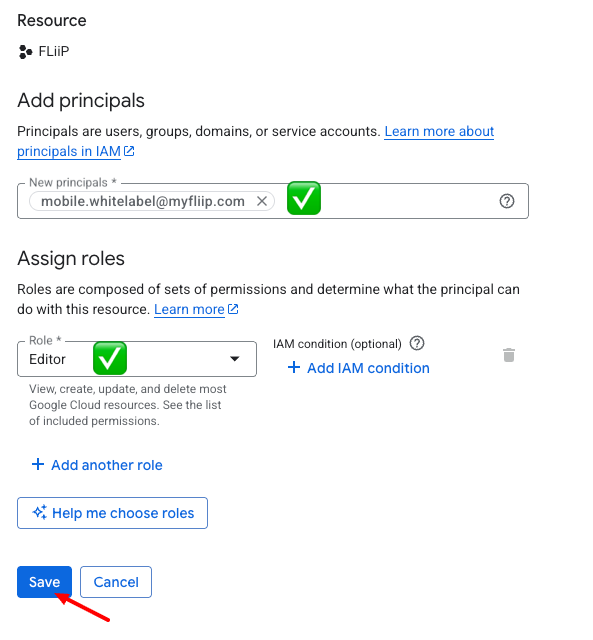
Enter mobile.whitelabel@myfliip.com as email, and assign the role of Editor 
Verify the entered information and click on “Save”
Firebase
🔗 URL: https://console.firebase.google.com/
Make sure you're in the project you created earlier.
-
Top left menu → Project settings (gear icon) → Users and permissions


-
If you don’t see FLiiP, click on “Add member”
-
Enter mobile.whitelabel@myfliip.com as email address
-
Assign the role of Editor
-
Click on “Add member” in bottom right corner
